Monday 18 June 2012

Finished!

I seem to have been knitting these socks for ages, picking them up every now and then when I had time, taking them to 'knit and natter' and probably nattering more than knitting. When I looked back I started this pair back around Easter time and have only just finished them in time to pack for the hols!


I managed to keep the textured pattern going, but on close inspection have noticed a couple of tiny mistakes - but who is going to look that closely when they are on my feet and in my boots! It will only be me that knows :-)


Beanie watched me pull them on and admire them and, ever hopeful, thought we were going for a walk!


Friday 15 June 2012

Summer holiday challenge

mmmmm...I just love to smell the honeysuckle especially in the evening as the scent seems so intense at that time of the day...


... and wafts in through the open windows - but not tonight as we have rain and wind here again!


A first for me - at the 'knit and natter' group I asked if someone could show me how to knit a cable stitch, but rather than show me, they got me to knit a sample. The reason behind my request was that C has asked if I will knit her a hat. She has seen these seriously fun tea cosy hats on a site called 'grannies knitts' (see here)


I just love the little flap for the spout!  which you can't actually see on this image. This hat is called 'Traditional afternoon', but there are others - Lady Grey, Darjeeling, and Coffee and Cream - I think they are brilliant. The company was started by a student at Cardiff University. His granny knitted hats for him and his friends really liked them and wanted one, his granny couldn't keep up with demand so he expanded his team of grannies to knit more. They use lovely yarns like alpaca and cashmere.

With this for inspiration, we had a look on Ravelry for patterns and found something similar. It is a free pattern published by Shana called Men's Cabled Hat, but there is a women's and men's size.
Not having knitted anything with a cable stitch before I thought it would be a good challenge. So, here is my little sample to remind me how to do the stitch.


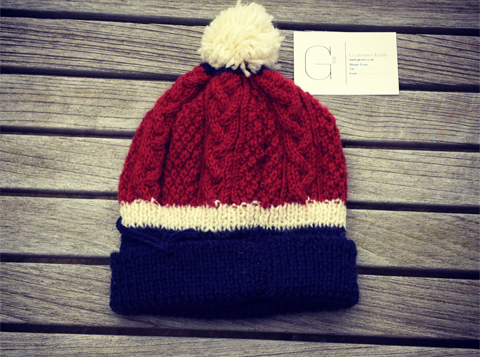
and the colour combination of wool that C has chosen,


and this will be a project that I will take with me on our family holiday.

Monday 4 June 2012

Wet afternoon project....dip-dying

A few weeks ago when C was home from Uni for a visit, the weather was so poor that we didn't want to venture outside, but we did want to do something constructive. We had all sorts of crafty and foodie ideas but nothing really hit the spot and then we had a flash of inspiration - it was just the sort of crafting idea to fill a wet afternoon. It was the sort of messy project that we did when C and her sister were small - and it involved water, dye and salt!

I had some plain calico bags, and we thought we had some cold water dye tucked away somewhere so we decided to try dip-dying! Rummaging around we found dye from when C had tried her hand at tie dying a while ago.

We had olive green, intense violet, ocean blue and tulip red dyes.


We choose 'intense violet' to start with, and C measured out and mixed up the dye in an old washing up bowl, whilst I rinsed out the calico bags - then the fun began!

It was all a bit hit and miss and mostly trial and error.

We dipped the bag into the dye to the highest point we wanted the dye to reach and only held it there for a few seconds then lifted it out. Then re-immersed the bag about a quarter of the way down from the top of the dye line and held it a little longer for the dye to take and become slightly darker and lifted it out again. We repeated this again further down the bag and then on the last dunk held it quite a while to achieve a deeper colour. We were trying to make a smooth graduation between dunks so not form an obvious line, which was quite difficult to do but found the best way to achieve this was to waggle ( a technical term!) the bag up and down a little so the line didn't stay in one place.


After the 'violet', we changed to 'tulip red' and C decided she would like to add a design on her bag and drew a pattern using some wax as a resist - which came out really well.  Then 'olive green' and finally 'ocean blue'. All such lovely colours.


Once we had finished all the colouring and washed and rinsed the bags, as the weather was so awful outside we had to put a up a washing line inside so they could dry.


A great way to brighten up a dreary day with the house festooned with bunting bags!